





What Is a Lighting Fixture Schedule?
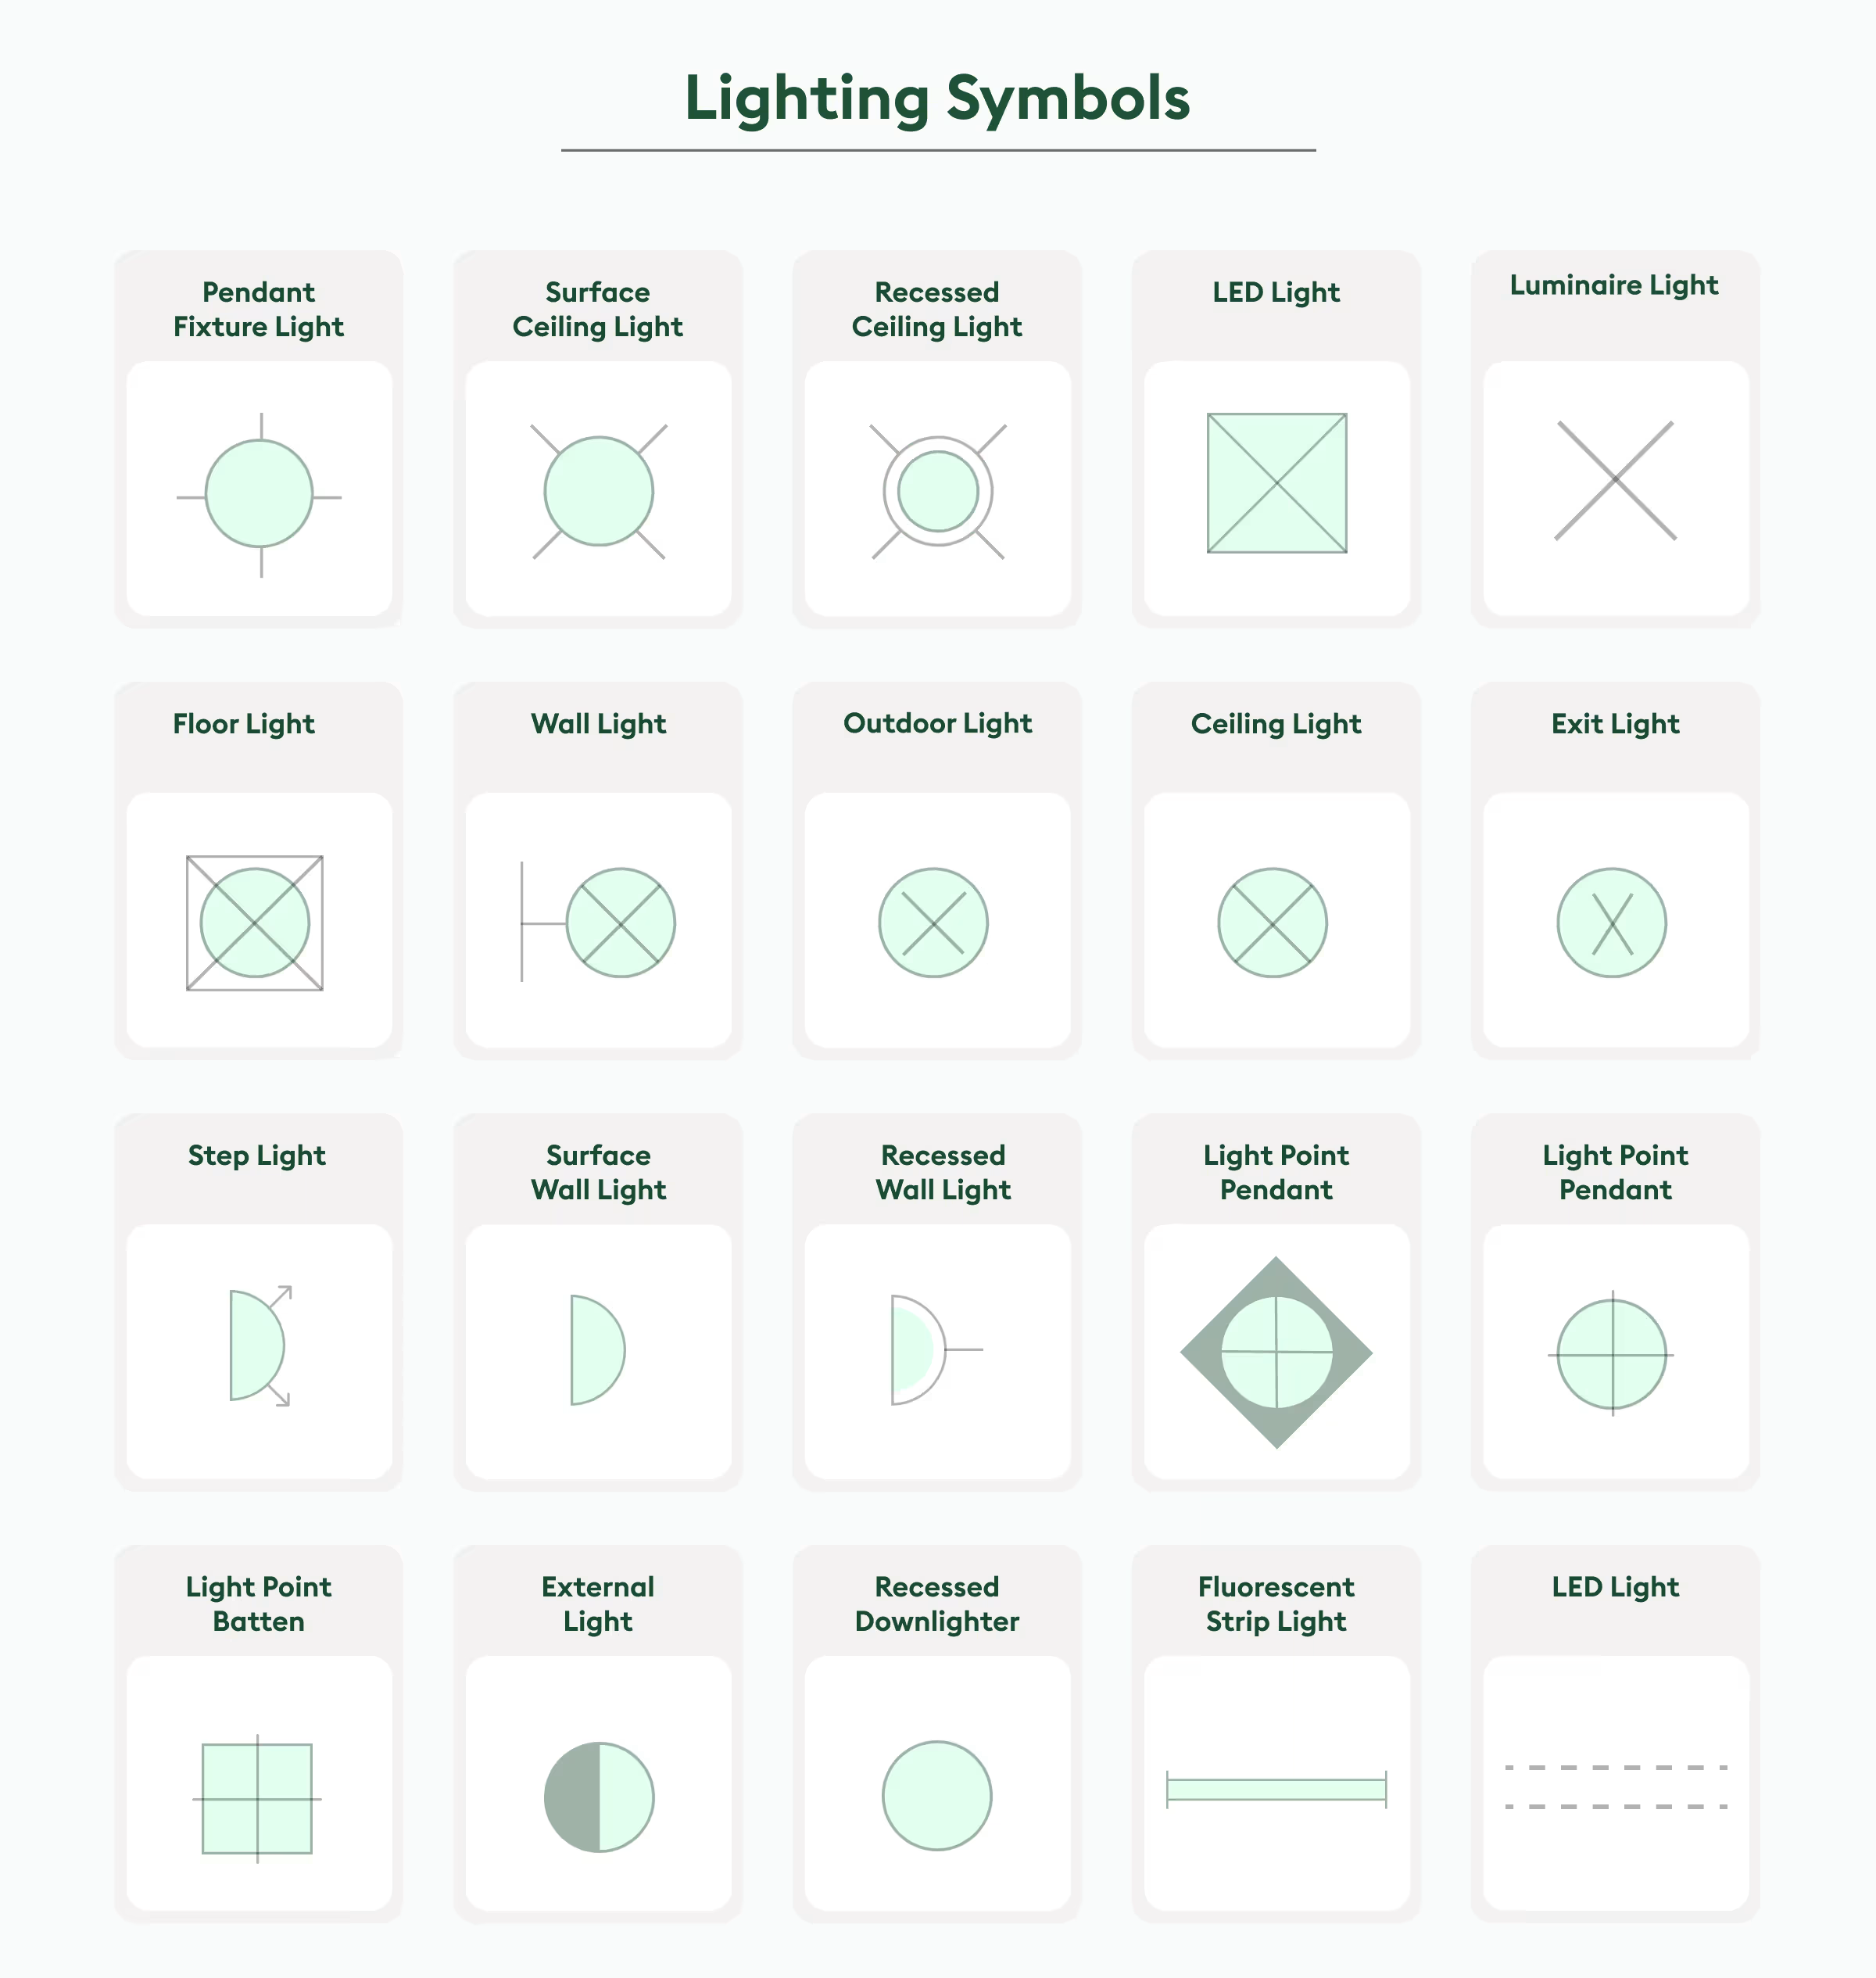
A lighting fixture schedule, also called a luminaire schedule or lighting schedule, is a table that identifies the different lighting fixtures specified for a project.
Each fixture is assigned a fixture type or fixture mark, usually a letter, number, or combination of both.
For example, a drawing may show fixtures as A1, A2, B1, or W1. The schedule provides the information behind each of those tags. Depending on the project, a schedule may include:
- Fixture type or mark
- Fixture description
- Manufacturer
- Catalog number
- Lamp or LED information
- Wattage
- Voltage
- Color temperature
- Lumens
- Mounting type
- Finish
- Lens or optical requirements
- Dimming or control information
- Emergency or battery backup requirements
- Special installation notes
The schedule acts as a cross-reference between the drawings and the specified lighting products. The reference schedule describes it as the master table for the project's luminaire types, while the specifications provide additional performance and substitution requirements.
For takeoffs, that means you use the schedule to determine what each fixture symbol represents, while the plans tell you where and how many times it occurs.
Why the Lighting Fixture Schedule Matters for Takeoff
Counting fixture symbols without checking the schedule can give you a quantity, but not necessarily a usable takeoff.
For example, suppose an RCP contains 45 symbols marked A1. Your light fixture count may be 45, but you still need to know what A1 actually represents. Is it a recessed LED troffer, a linear fixture, or something else? Does it require a specific driver? Is it 120V or 277V? Is it suspended, recessed, or surface mounted?
Those details can affect material pricing, labor, accessories, and installation requirements.
A complete electrical takeoff therefore needs to connect three pieces of information:
Plan symbol → Fixture schedule → Takeoff quantity
This is particularly important on commercial projects where a drawing set can contain dozens of fixture types and multiple RCPs.
Steps to Read a Lighting Fixture Schedule for Takeoff
Start With the Fixture Type or Fixture Mark
The first column you should identify is the fixture type or fixture mark. This is the code used to identify a fixture throughout the drawing set. Common examples include:
- A1
- A2
- B1
- C1
- W1
- EM1
The exact naming system varies by project, so do not assume that a fixture mark has the same meaning from one job to another.
For example, A1 on one project's lighting schedule could be a recessed 2x4 fixture, while A1 on another project could represent a decorative pendant.
When performing the takeoff, match every symbol on the RCP to its corresponding fixture mark in the schedule. If the plan shows A1, find A1 in the schedule before assigning a fixture description or pricing.
Read the Fixture Description
Next, look at the fixture description. The description gives you a basic understanding of what the fixture physically is. It may identify a fixture as:
- Recessed LED troffer
- Linear pendant
- Surface-mounted fixture
- Wall-mounted sconce
- Downlight
- Strip light
- Bollard
- Exterior wall pack
This information helps you distinguish fixtures that may have similar-looking symbols but different installation requirements.
For takeoff purposes, record the description alongside the fixture mark rather than relying on the mark alone.
Check the Manufacturer and Catalog Number
The catalog number is one of the most important details when you move from quantity takeoff to pricing. A manufacturer's catalog number identifies the specified product and may include codes for options such as:
- Fixture size
- Light output
- Color temperature
- Optics
- Lens
- Finish
- Mounting
- Dimming
- Driver configuration
A fixture can look identical on the RCP while having a different catalog number and therefore a different price or specification.
The fixture schedule reference also notes that catalog strings can encode multiple product options, making the complete catalog number more useful than a shortened product description.
During takeoff, capture the full catalog number whenever it is provided. If the number is incomplete or references another specification, flag it rather than filling in the missing information yourself.
Identify the Mounting Type
Mounting information tells you how the fixture is installed. Common mounting descriptions include:
- Recessed
- Surface mounted
- Suspended
- Pendant mounted
- Wall mounted
- Pole mounted
- Track mounted
Mounting can affect more than the fixture itself. It may also affect labor, supports, accessories, and installation time.
For example, a suspended linear fixture may require suspension hardware that a recessed fixture does not. A wall-mounted fixture may require a different mounting arrangement from a ceiling-mounted fixture.
If the schedule includes mounting details, carry them into your takeoff notes so the estimator has enough information to price the installation correctly.
Check Voltage and Electrical Characteristics
Do not skip the electrical information in the schedule. Lighting fixtures may be specified for different voltages, such as 120V or 277V, depending on the project and circuiting. You may also see information about:
- Input voltage
- Wattage
- Driver type
- Dimming
- Emergency operation
- Control systems
Control requirements can be particularly important. A fixture may require 0-10V dimming, DALI, occupancy controls, or another control arrangement.
These details can affect the associated wiring and control takeoff, so the fixture count alone may not represent the full electrical scope.
If you are also tracing circuits and other electrical components, Beam AI's guide to reading an electrical panel schedule can help with the circuit side of the workflow.
Review Wattage, Lumens, and Color Temperature
Lighting schedules often contain performance information such as wattage, lumens and color temperature. These details help you distinguish between fixtures that may otherwise appear similar.
For example, two fixtures could both be identified as linear LEDs, but one might have a different output or color temperature. If they have separate fixture marks, keep them separate in your takeoff.
You should also avoid treating wattage as a substitute for the catalog number. The wattage describes one characteristic of the fixture; it does not identify the complete product.
Look for Special Notes
The notes column can contain information that is easy to miss but important for estimating. Look for references to:
- Emergency battery backup
- Emergency circuits
- Occupancy or daylight controls
- Dimming
- Wet or damp locations
- IC-rated fixtures
- Custom finishes
- Special lenses
- Mounting accessories
- Alternate fixtures
- Manufacturer substitutions
- Installation requirements
Project notes may also direct you to another drawing or specification section. Read these notes before finalizing your takeoff. A fixture count can be correct while the material list is incomplete if these requirements are ignored.
How to Match the Schedule to the Reflected Ceiling Plan
The reflected ceiling plan (RCP) is where you typically find the location and quantity of ceiling-mounted lighting fixtures.
A practical workflow looks like this:
Step 1: Open the lighting fixture schedule and identify every fixture mark.
Step 2: Open the corresponding RCP.
Step 3: Locate each fixture symbol and read its tag.
Step 4: Match the tag to the correct schedule row.
Step 5: Count the fixtures by type.
Step 6: Check the count against room layouts, enlarged plans and other relevant drawings.
Step 7: Record the quantity with the correct fixture description and catalog information.
For example, if the RCP shows:
- A1 = 36 fixtures
- A2 = 12 fixtures
- W1 = 8 fixtures
- EM1 = 4 fixtures
Your fixture takeoff should preserve those types separately rather than combining them into one total lighting quantity, making the resulting estimate easier to price and review.
What Can Go Wrong in a Lighting Fixture Takeoff
Counting symbols without checking the schedule
A symbol count without its corresponding fixture information does not give you a complete takeoff.
Assuming fixture marks are standardized
A1 does not always mean the same thing. Always use the current project's schedule.
Ignoring the catalog number
Similar-looking fixtures can have different specifications and costs. Use the complete catalog information when available.
Missing emergency fixtures
Emergency lighting may be identified through a separate mark or notation. Check the schedule and plans carefully.
Overlooking controls
Dimming and lighting-control requirements can introduce additional electrical scope beyond the fixture itself.
Using an outdated drawing set
Lighting layouts can change through addenda and revisions. Make sure you are working from the latest issued drawings before finalizing quantities.
Revision management is a broader challenge in electrical estimating because updated drawings can require quantities to be checked again.
How to Organize a Lighting Fixture Takeoff
A simple takeoff table can keep the information organized:
The exact fields will depend on the project and your estimating workflow. The goal is to preserve the connection between the fixture mark, product information, and quantity.
Once the fixture quantities are organized, you can combine them with the rest of the electrical material takeoff and apply material and labor pricing.
Can AI Help With Lighting Fixture Takeoffs?
Manual fixture counting can become time-consuming when a project has multiple floors, large RCPs, numerous fixture types, or frequent revisions.
AI-based takeoff software can help automate parts of this process by reading drawing sets, identifying electrical symbols, extracting quantities, and organizing the results. Beam AI, for example, processes electrical plans, legends, and specifications to generate structured electrical takeoffs, with 99%+ and QA-reviewed outputs before delivery. For contractors handling high bid volumes, this can reduce the repetitive work involved in counting fixtures and reviewing large drawing sets.
Automation does not remove the need to understand the drawings. You still need to review the schedule, confirm scope, check unusual fixture requirements and resolve discrepancies between the plans and specifications.
Final Takeaway
Learning how to read a lighting fixture schedule starts with understanding the relationship between the fixture mark, schedule and reflected ceiling plan. Use the fixture mark to identify the correct schedule row, then review the description, catalog number, mounting, voltage, controls, performance details and notes before assigning the fixture to your takeoff.
Once you have matched the schedule to the plans, count each fixture type separately and verify the quantities against the latest drawing set. This gives you a more complete lighting takeoff and creates a reliable quantity list for pricing and procurement.