




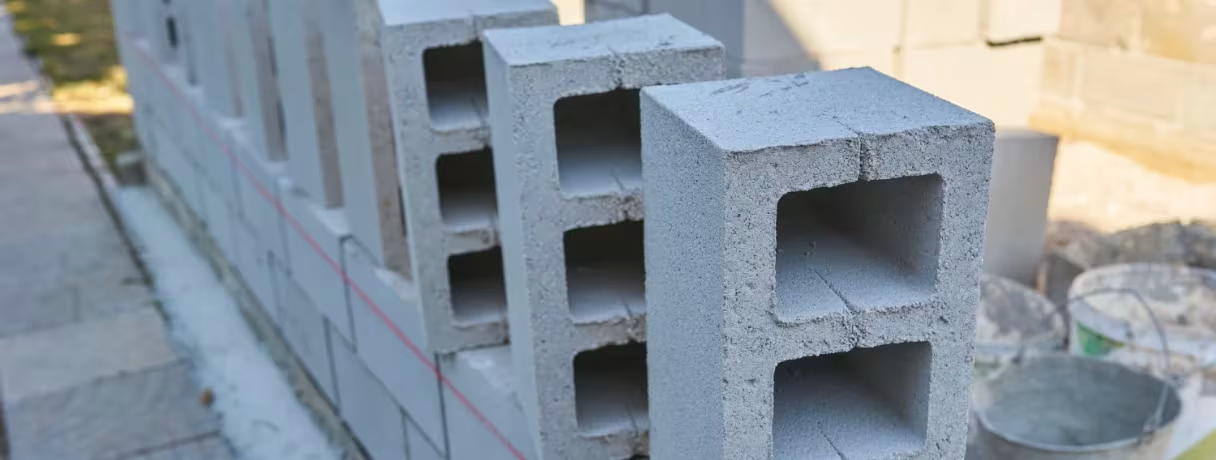
The Elements Behind a Durable Masonry Wall
Masonry looks simple when you see the finished wall. The real work happens in the details behind that surface. The foundation must support the wall properly.
Units need consistent alignment, mortar joints need proper tooling, and reinforcement must match the design.
Structural walls need appropriate reinforcement, connections, and movement provisions. This guide explains how masonry wall construction works from the ground up.
It also compares major wall types and covers insulation, moisture control, reinforcement, and workmanship.
What Is a Masonry Wall?
A masonry wall is built by preparing the foundation, establishing the first course, and laying brick or concrete masonry units with mortar. Reinforcement, grout, wall ties, flashing, movement joints, and drainage are added where required. The exact method depends on whether the wall is structural, retaining, veneer, or nonstructural.
The wall can serve several purposes within a building. It may carry structural loads, divide spaces, resist fire, provide sound control, or form an exterior enclosure. Some masonry walls perform several of these functions at once. For example, reinforced CMU can form a structural exterior wall.
A brick veneer can provide an exterior finish while relying on separate structural backing. Wall thickness also varies considerably.
Common concrete masonry units are manufactured in nominal widths such as 4, 6, 8, 10, and 12 inches. The appropriate wall thickness depends on structural, fire, thermal, and project requirements.
Note: Structural masonry should follow project drawings, specifications, local codes, and applicable masonry standards.MS 402 covers masonry design, while TMS 602 establishes minimum construction requirements.
Types of Masonry Walls and Where They Are Used
Different masonry systems solve different construction problems.
The distinction between these systems matters during both design and construction. A masonry retaining wall faces soil pressure that ordinary partitions do not.
How Is a Masonry Wall Built? The Step-by-Step Process
Most masonry wall construction follows a similar sequence. The exact details change with the wall system, materials, and project requirements.
Prepare the Footing or Foundation
The foundation creates the bearing surface for the wall. It must be designed for the wall's weight, applied loads, soil conditions, and site requirements.
Foundation dowels may be installed where reinforced masonry requires vertical steel. Their locations must align with the masonry cells and structural drawings.
Below-grade walls also require careful attention to waterproofing and drainage. Do not begin a masonry wall until the foundation and layout have been properly checked.
Establish the First Course
The first course determines the position of everything above it. Masons establish wall lines, corners, openings, elevations, and offsets before placing units.
Masons carefully level and align the first units. This is one place where small errors can become expensive later. An incorrectly positioned first course can affect openings, corners, reinforcement, and the finished wall.
Lay the Units and Mortar
Masonry units are placed course by course using the specified mortar. CMU construction commonly uses running bond, with vertical joints offset between adjacent courses.
Mortar creates the bond between individual masonry units. It also contributes to load transfer and weather resistance within the designed wall assembly.
Standard CMU construction commonly uses mortar joints around 3/8 inch thick. Project specifications and applicable standards control the actual requirements.
Openings need particular attention during this stage. Lintels, reinforcement, flashing, anchors, and other components must align with the construction drawings.
These details also contribute to the overall material scope, making accurate drawing review important before construction begins. For contractors handling multiple projects, automating masonry quantity takeoffs can help identify and organize the quantities required across a masonry scope.
Tool the Mortar Joints
Mortar joints are tooled after the mortar reaches the appropriate firmness. Tooling compresses the mortar and creates the specified joint profile.
It also contributes to the appearance and performance of the finished masonry. Timing matters here. Tooling mortar too early can disturb the joint and affect its finished surface.
Add Reinforcement and Grout
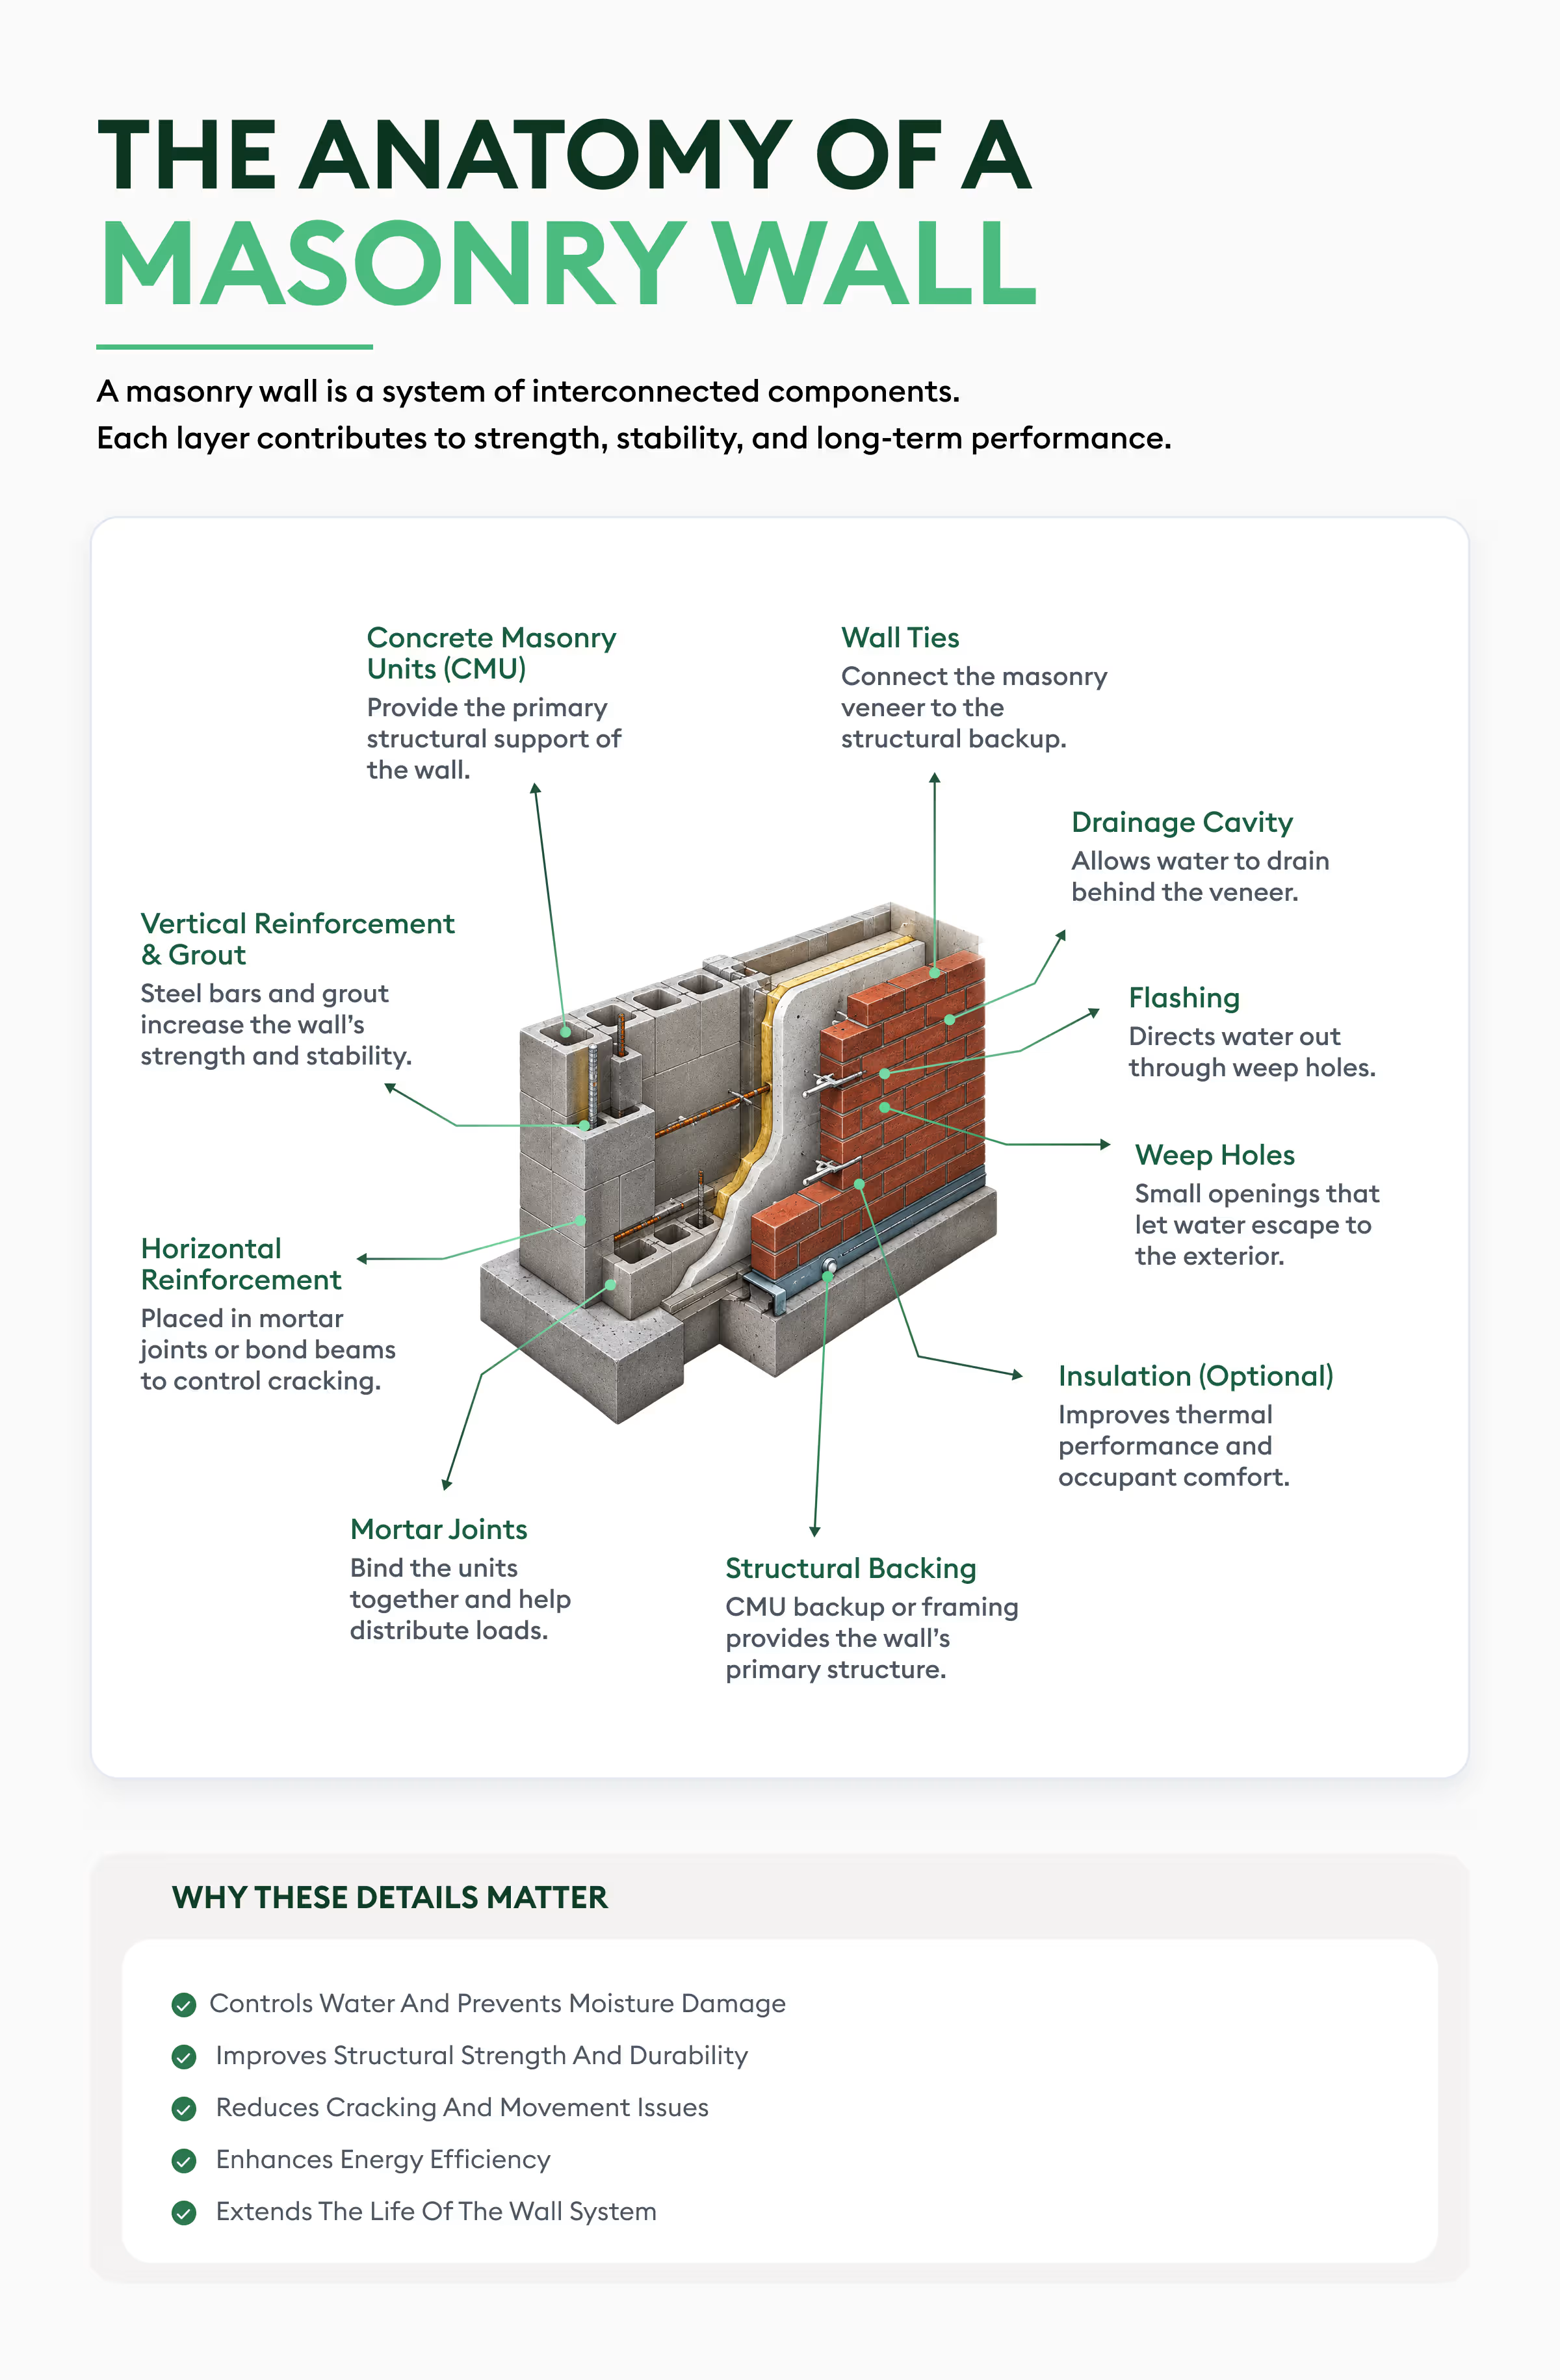
Use reinforcement where the structural design requires it. Vertical reinforcement may run through aligned CMU cells. Horizontal reinforcement can occur through bond beams or joint reinforcement. Joint reinforcement is commonly used for crack control and other specified functions.
CMHA notes that joint reinforcement can also increase resistance to horizontal bending. It should not automatically be treated as a substitute for structural reinforcement.
Grout surrounds reinforcement inside designated cells and helps the masonry and steel act together.
Bar size, spacing, lap requirements, grout placement, and grouting sequences come from the design. There is no single reinforcement spacing that works for every masonry wall.
Install Wall Ties and Anchors
Wall ties connect masonry components or connect veneer to structural backing. They are especially important in anchored veneer construction.
Tie type, spacing, embedment, and corrosion protection depend on the wall design. CMHA guidance notes that exterior masonry veneer expects some water penetration into the cavity.
Flashing and weeps then help collect and redirect that water toward the exterior.
Provide Control and Movement Joints
Masonry experiences dimensional changes from temperature and moisture. Concrete masonry can also experience drying shrinkage.
Control joints provide planned locations for movement and crack control.
CMHA identifies control joints as a way to accommodate movement caused by shrinkage and thermal effects.
Joint locations should follow the project's design rather than a generic spacing rule.
Cure, Protect, and Finish the Wall
Fresh masonry needs appropriate protection while mortar and grout develop their properties.
Weather can affect masonry work significantly.
Cold temperatures, precipitation, strong winds, and rapid drying can create construction problems. The project specifications should define required cold-weather and hot-weather procedures.
After curing and cleaning, the wall receives its specified finish. That finish may remain exposed or receive paint, coating, plaster, or another facade treatment.
.avif)
How Is a Concrete Masonry Unit Wall Built?
A concrete masonry unit wall is typically constructed from hollow or solid concrete blocks. The units are placed in courses, with cores aligned wherever reinforcement or grout is required. Running bond is common, although other patterns can be specified for architectural or structural reasons.
CMU walls can be partially or fully grouted depending on their design. Reinforcement may be concentrated around openings, corners, bond beams, or other structural locations.
CMHA's load-bearing wall guidance demonstrates designs using different wall thicknesses and reinforcement arrangements.
One example evaluates an 8-inch reinforced CMU wall with different reinforcing bar sizes. The important takeaway is that wall thickness and reinforcement must respond to actual design loads. They should not be selected from a generic rule of thumb.
How to Build a Brick Masonry Wall
A brick masonry wall uses smaller units and offers more flexibility in bond patterns. Common patterns include running bond, stack bond, and other architectural arrangements.
Bricks are laid in successive courses with mortar forming the bed and head joints. Corners and openings require careful layout because the bond pattern must remain coordinated.
Exterior brick construction also requires attention to flashing, drainage, movement, and connections.
Brick veneer depends heavily on proper detailing behind the visible brick surface. The veneer should therefore be treated as part of the complete wall envelope.
How Reinforcement Supports Masonry Walls
Masonry bearing walls can transfer roof, floor, beam, and other structural loads. Their design must consider axial loads, bending, shear, lateral forces, openings, connections, and wall geometry.
A load-bearing masonry wall may use reinforced or unreinforced construction. The choice depends on structural requirements and applicable code provisions.
Reinforced masonry can use vertical bars, horizontal reinforcement, bond beams, and grout.
Structural design determines the required reinforcement.
For example, CMHA design guidance includes examples of reinforced 8-inch CMU walls with reinforcement spacing selected for specific load conditions.
That does not mean those values apply to every project. They illustrate why reinforcement must be selected from actual design conditions.
The Masonry Society's TMS 402/602-22 provides the principal design and construction framework for masonry structures.
Masonry Wall Insulation and Moisture Control
Thermal performance and moisture management should be considered together. Common insulation approaches include cavity insulation, rigid board insulation, and insulated CMU.
Cavity insulation
A cavity wall can provide space for insulation between masonry layers.
The cavity can also provide a drainage path for water that enters the exterior masonry.
Rigid board insulation
Rigid insulation can be incorporated into several masonry wall assemblies.
Its location depends on thermal targets, vapor control, fire requirements, and the overall envelope design.
Insulated CMU
Some CMU systems incorporate insulation within the unit or its cores. This can improve thermal performance without requiring a completely separate wall system. Moisture control remains essential regardless of insulation type.
CMHA recommends a combination of surface protection, internal protection, and drainage or drying strategies. Flashing, weeps, and vents form part of that drainage approach.
Masonry Construction Best Practices
Good masonry construction depends heavily on consistent execution.
Keep the Wall Plumb and Level
Check alignment throughout construction. Do not wait until the final course to discover accumulated errors.
Follow the Specified Bond Pattern
Bond patterns affect appearance and can affect structural detailing. Stack bond, for example, has specific reinforcement considerations.
CMHA guidance notes additional horizontal reinforcement requirements for structural continuity in stack-bond construction.
Tool Joints at the Correct Time
Proper tooling produces consistent, compressed mortar joints. The timing should match the mortar's firmness and project requirements.
Protect Drainage Paths
Flashing and weeps only work when they remain open and properly connected. Do not allow mortar droppings or debris to block intended drainage paths.
Coordinate Movement Joints
Control joints should be planned before construction begins. CMHA guidance identifies openings, wall intersections, changes in wall geometry, and other locations requiring careful crack-control consideration.
Plan for Weather
Masonry materials need protection during unfavourable weather. Cold-weather construction requires particular attention because freezing can affect developing mortar and grout properties. Follow the project's specified procedures rather than relying on informal site practices.
What Should Contractors Know Before Estimating Masonry Work?
Once the wall system is understood, the next challenge is translating drawings into accurate quantities.
A masonry scope can include far more than wall area. Estimators may need to quantify CMU, brick, stone, mortar, grout, reinforcement, lintels, flashing, ties, insulation, openings, and accessories.
Addenda can introduce another layer of complexity. This is where automating masonry quantity takeoffs can reduce repetitive measurement work while keeping estimators involved in scope review.
The estimating process still requires judgment. Estimators need to review scope, validate quantities, check exclusions, and account for project-specific requirements.
For a broader look at how contractors estimate masonry projects, Beam AI also covers workflows for organizing masonry quantities and pricing. The purpose is not to replace construction expertise. It is to reduce repetitive work so estimators can spend more time reviewing the details that affect the final bid.
How Masonry Contractors Are Improving Preconstruction Workflows
The way a masonry wall is built may not change, but the work required before construction can vary significantly from project to project.
That is especially true when estimators are working through large drawing sets, revisions, and multiple bids at once.
JBW Installations, a masonry and siding subcontractor, previously spent 45–60 hours on a single takeoff. That limited the team to just 4–8 proposals each month. After adopting Beam AI, the company reports saving 50+ hours per project, increasing proposal volume to 24–40 per month, winning 40% more jobs, and increasing revenue by 1.7X.
Builders Stone & Supply faced a similar bottleneck on larger masonry projects. A single large project could occupy one estimator for an entire week, especially as drawing complexity and addenda increased. With Beam AI, the company reports saving one week on larger jobs, improving takeoff accuracy, and doubling its bid potential.
These examples highlight an important part of masonry work that happens before anyone lays the first block or brick.
Accurate quantities, organized drawings, and efficient scope review can give masonry teams more capacity to evaluate projects, prepare bids, and move into construction with better information.



.jpg)